Teachable Integration

Send Welcome Messages to Your New Teachable Students Using DialMyCalls and Zapier
In this article, we’re going to show you how to combine Teachable and DialMyCalls using Zapier to send out welcome messages to new students. Zapier is a platform that makes automating different services super easy, saving you time and resources in the long run.
The example we’re going to use today involves sending out a welcome email to anyone who signs up for your Teachable classes. You can also set this Zap up to only welcome people who enroll in your courses, or create separate Zaps for both types of signups! This will help add a personal touch to your Teachable courses and allow you to provide new students with free resources.
If you’ve never used DialMyCalls, it’s a free-to-start platform for automatically sending SMS (text) messages, either to individuals or groups. By combining it with Zapier, you can send mass text messages automatically, creating a useful and interactive notification system. Though we’re just going to be sending text messages to ourselves in this example, you can apply this service to your business in several ways.
What You’ll Need:
- A Zapier account (free)
- A DialMyCalls account (free)
- A Teachable account ($29+/month)
Step 1: Create Your Zap
The first step is the simplest: creating your Zap. To get started, log in to Zapier and head over to your Dashboard. There, you’ll see a big box in the middle of the screen labeled What apps do you want to connect today?:
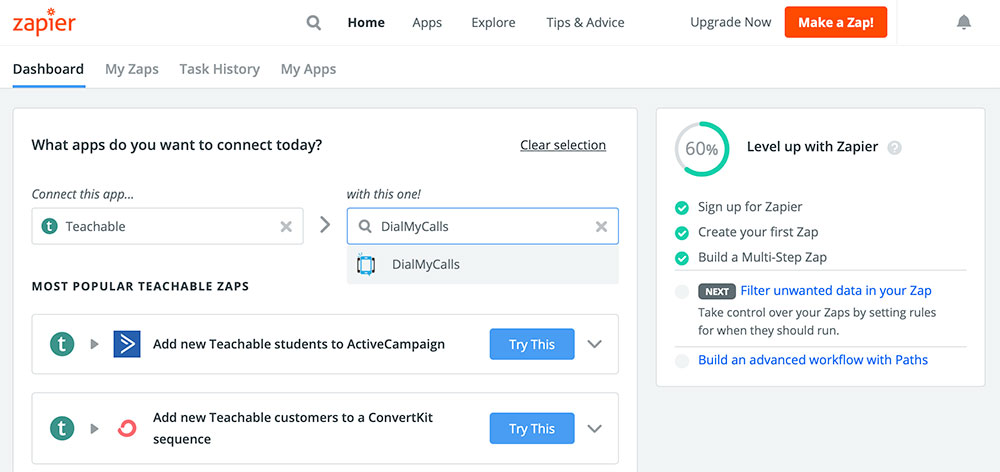
You can see in the above screenshot that we’ve already started filling in this Zap with our apps. To do the same for yourself, just type “Teachable” in the Connect this app… field and “DialMyCalls” in the with this one! field, selecting each app when it appears in the dropdown menu.
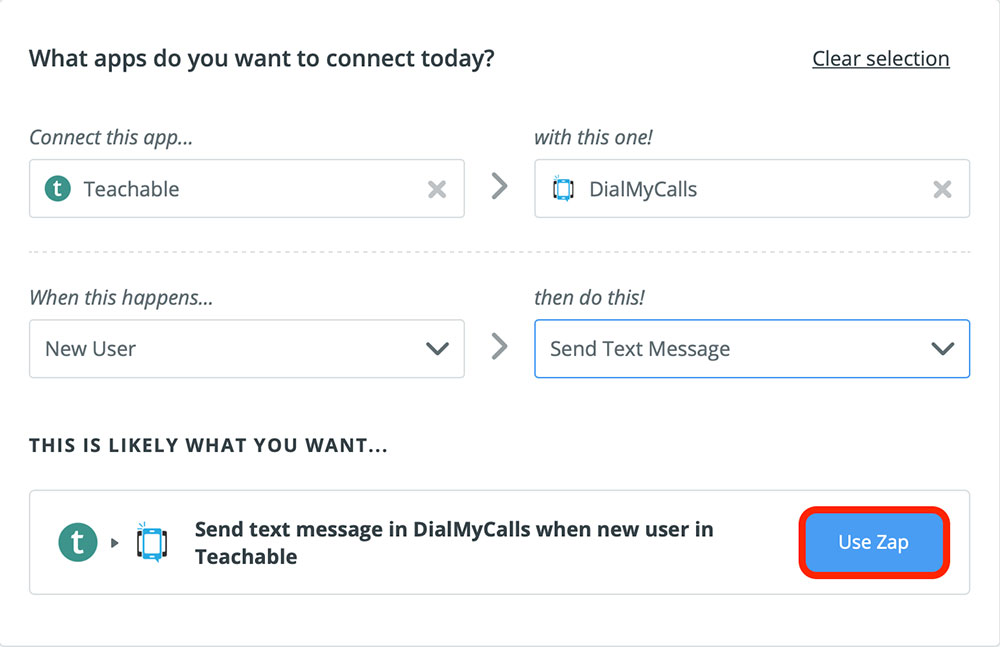
After both of these fields are filled in, two more will appear. In the first new field, When this happens…, select New User. In the second field, then do this!, select Send Text Message. Once you’ve got all of your fields filled in, go ahead and press the blue Use Zap button:
Step 2: Connect Your Teachable Account
After pressing the Use Zap button, you should be looking at the following screen:
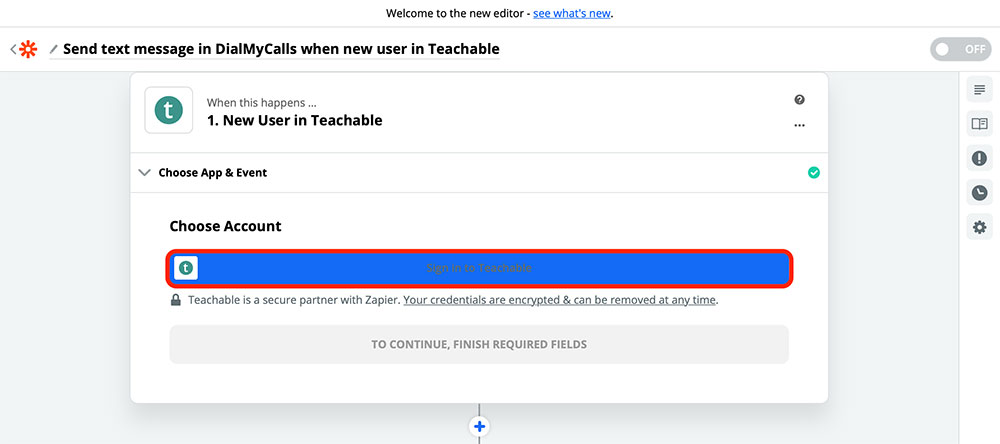
This is where we’re going to connect your Teachable account to Zapier. If you’ve already used Teachable with Zapier in the past, then you should see your Teachable account already available as an option. Otherwise, you’re going to need to press that big blue button highlighted in red above. Zapier will then take you to this page:
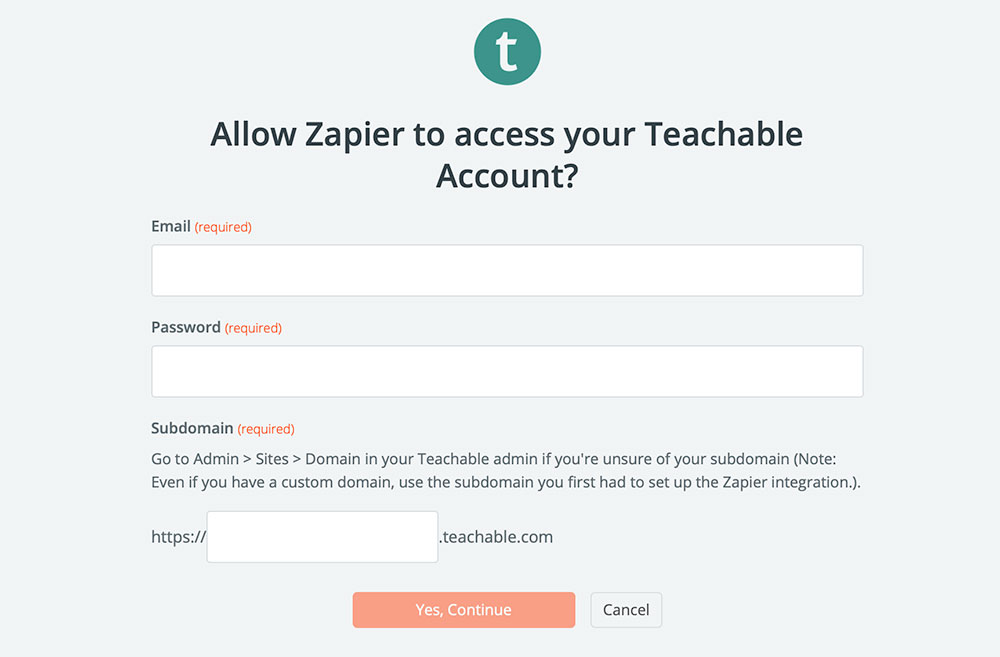
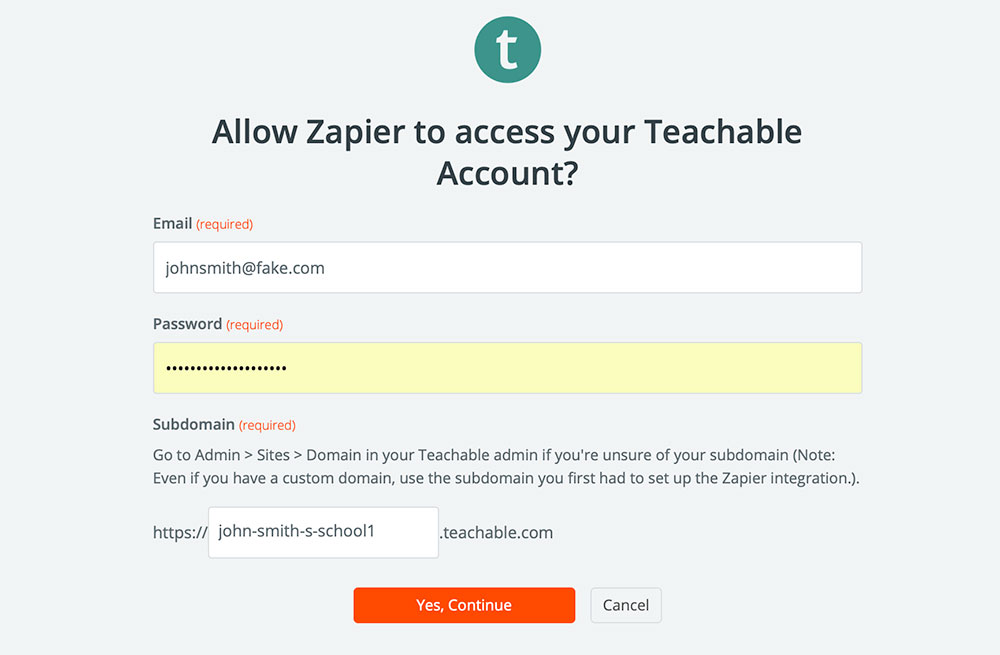
The login information that you’re going to enter is the login info for your Teachable account. Go ahead and fill in your Teachable email and password in the corresponding fields.
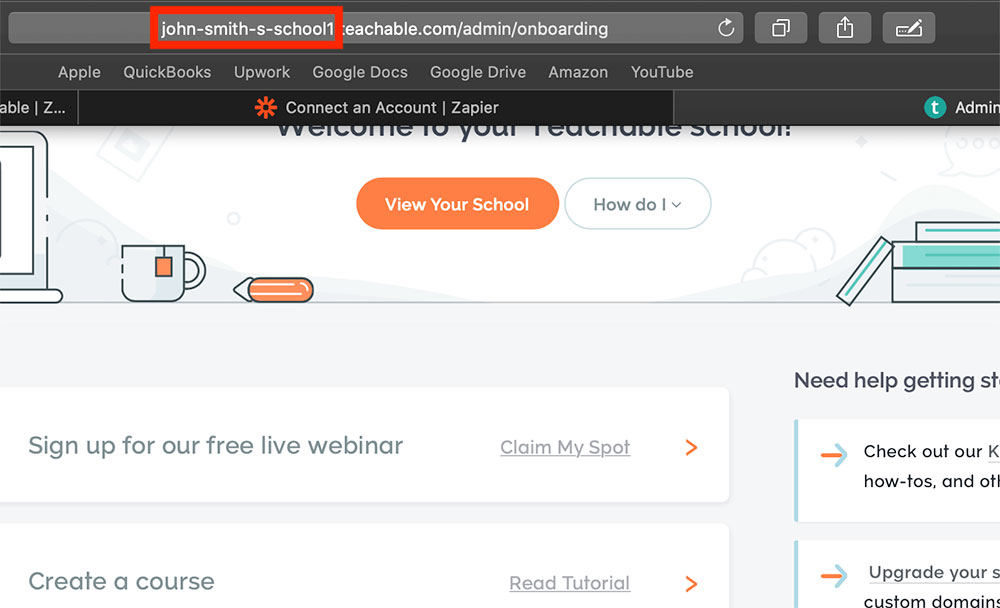
For the Subdomain field, you’re going to need to copy the first part of your Teachable URL, as shown in red below:
After you’ve filled in all of your information, you can select Yes, Continue:
You should now see your Teachable account listed as an option in Zapier:
Go ahead and press that big Continue button to continue.
Next, Zapier is going to ask you if you want to test your Zap so far:
You can test the Zap if you want, though it isn’t really necessary at this point. If you don’t want to test it yet, go ahead and press SKIP TEST.
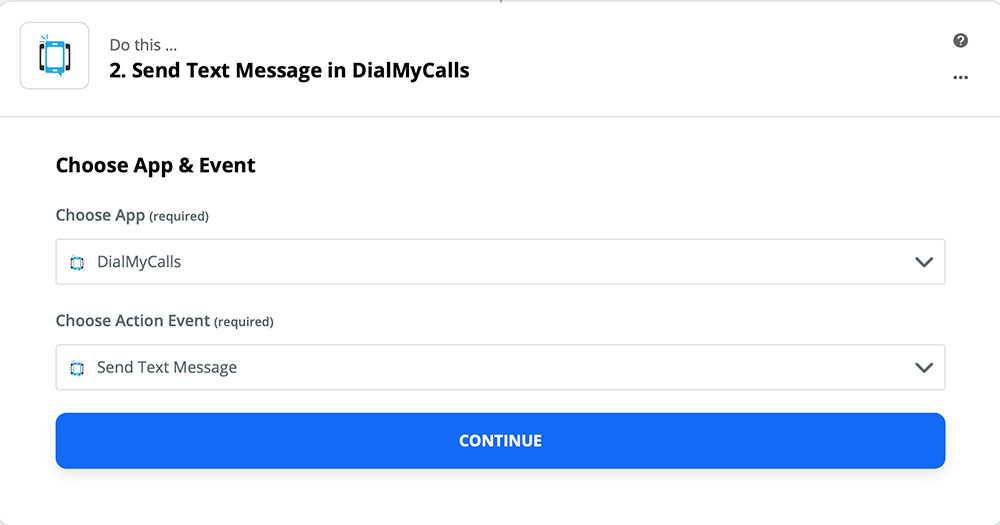
Step 3: Create Your DialMyCalls Action
Now it’s time to create your DialMyCalls Action. Your Action is what this Zap is actually going to do when it runs. In our case, we want it to send out a text message to all of our new Teachable users. Before pressing Continue, make sure that your screen matches ours:
On the next page, Zapier is going to ask you to connect your DialMyCalls account. If you’ve already used DialMyCalls with Zapier before, you should see your account already listed as an option, like so:
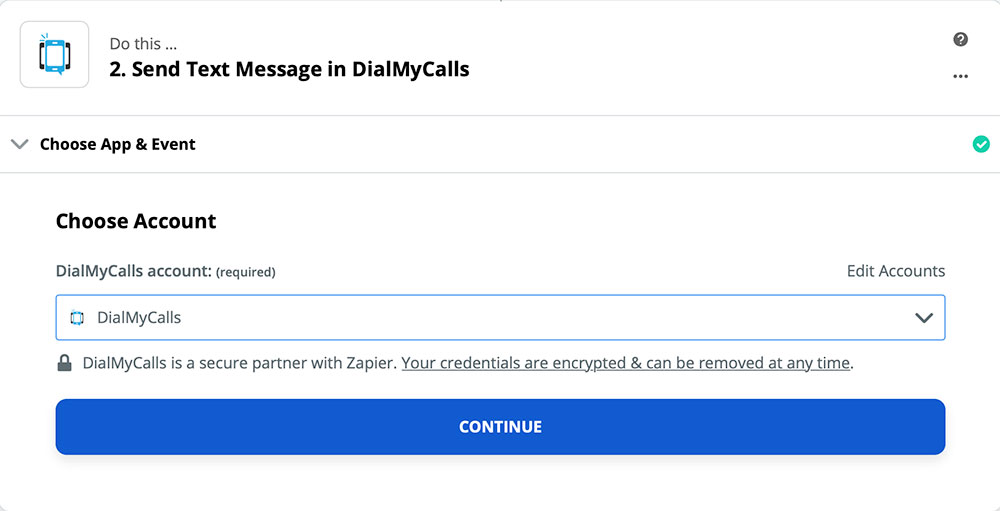
If you haven’t already connected your DialMyCalls account to Zapier, then you’ll need to go through similar steps as we did in Step 2 to get the two services connected. Once you have your DialMyCalls account connected and selected, go ahead and press Continue.
That will take you here:
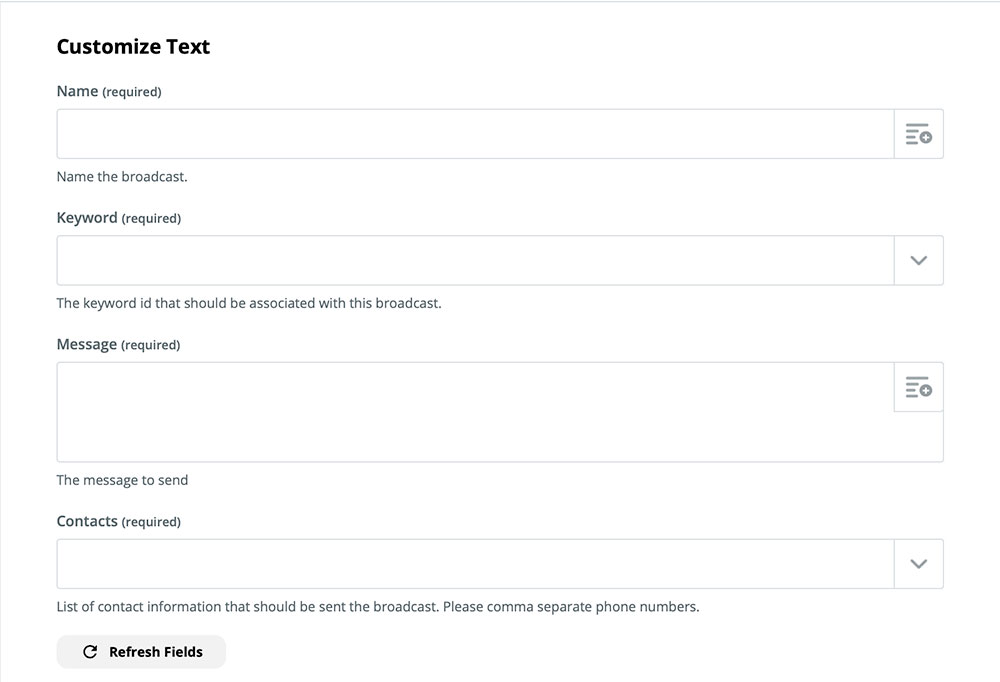
This is your Action template. It’s where you’re going to fill in all of the information that tells your Zap how to do what you want it to do.
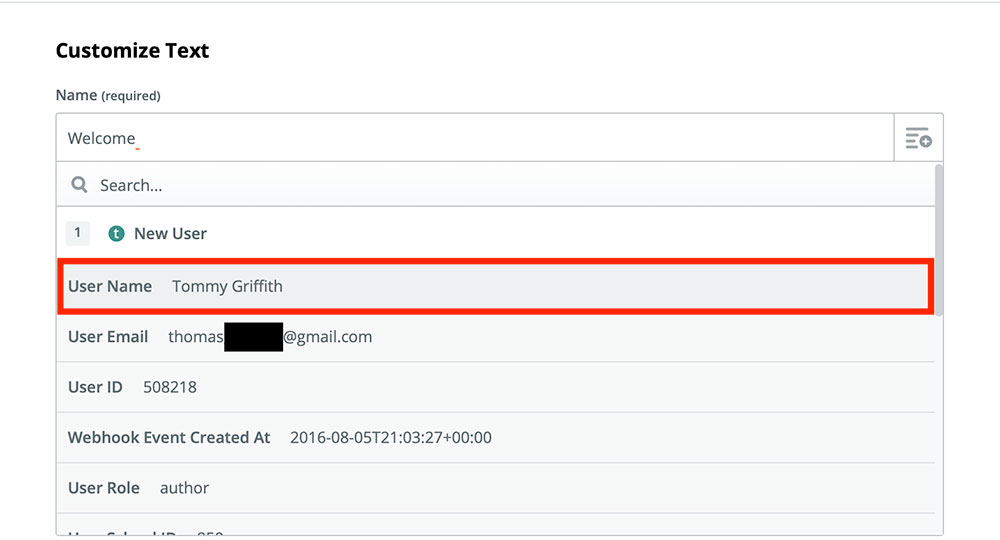
To start, we’re going to fill in the Name field. This will be the name of the email you’re going to send out to your new users. You can name it whatever you like, though we think incorporating the new user’s name is a great way to go. To do this, open the dropdown menu beside the Name field and choose User Name:
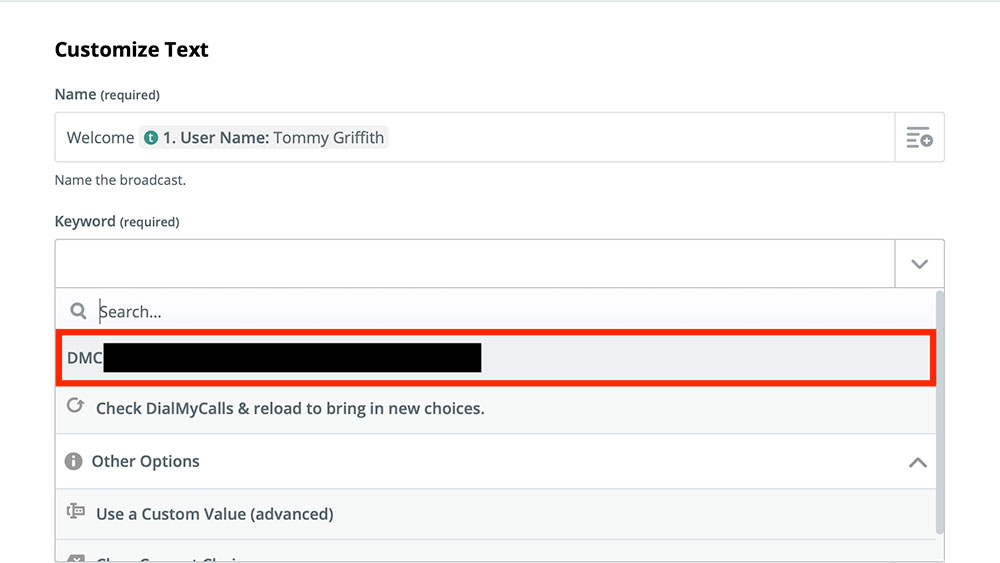
Next up is the Keyword field. This is going to show who your message is from. If you have a paid DialMyCalls account, you can create a custom Keyword. Otherwise, you’ll just pick the default Keyword that comes with your account:
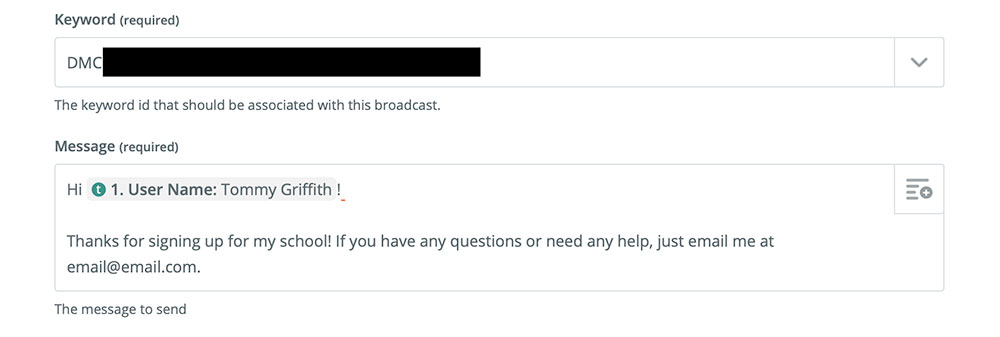
After that is the Message field, which is where you get to show a bit of creativity. As you can probably guess, this is the message that your new users are going to see once they sign up for your Teachable classes. You can make it informative or personal, throw in some special offers, provide resources for your classes, and more. Here’s a simple take on what your message could look like:
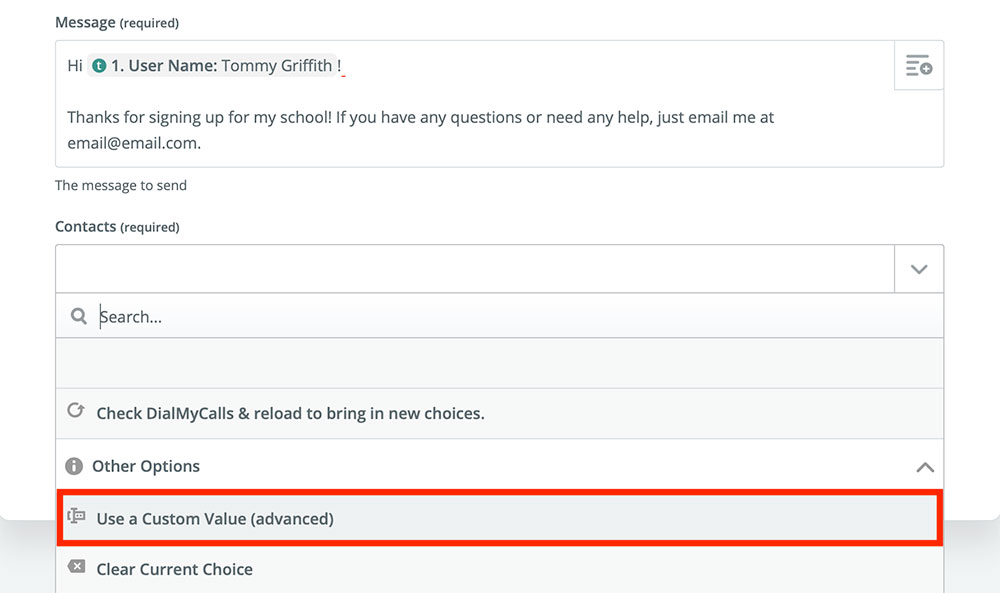
Finally, we have the Contacts field. You may have noticed that we chose Send Text Message for our Action, even though the purpose of this Zap is to send an email. That’s because Teachable doesn’t take your new students’ phone numbers, so instead of sending them a text, we’re sending them an email.
Since this isn’t how this Action normally works, though, we’re going to need to do a little finagling. First, in the Contacts field, choose Use a Custom Value:
This will create a new field called Custom Value For Contacts Phone. In this new field, you’re going to select User Email from the drop-down menu:
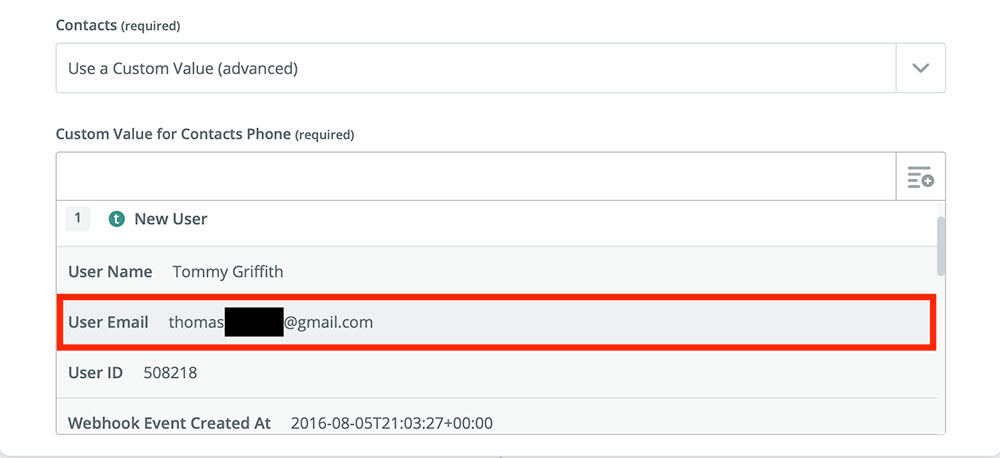
Now, instead of sending a text message to your new users, this Zap will send them an email over SMS text message. Go ahead and double-check that everything in your Action template looks the way it should, and if it does, press Continue.
Step 4: Test and Turn On Your Zap
On the next page, Zapier will give you another chance to test your Zap. Now is a good time to test your Zap and make sure that everything works as it should:
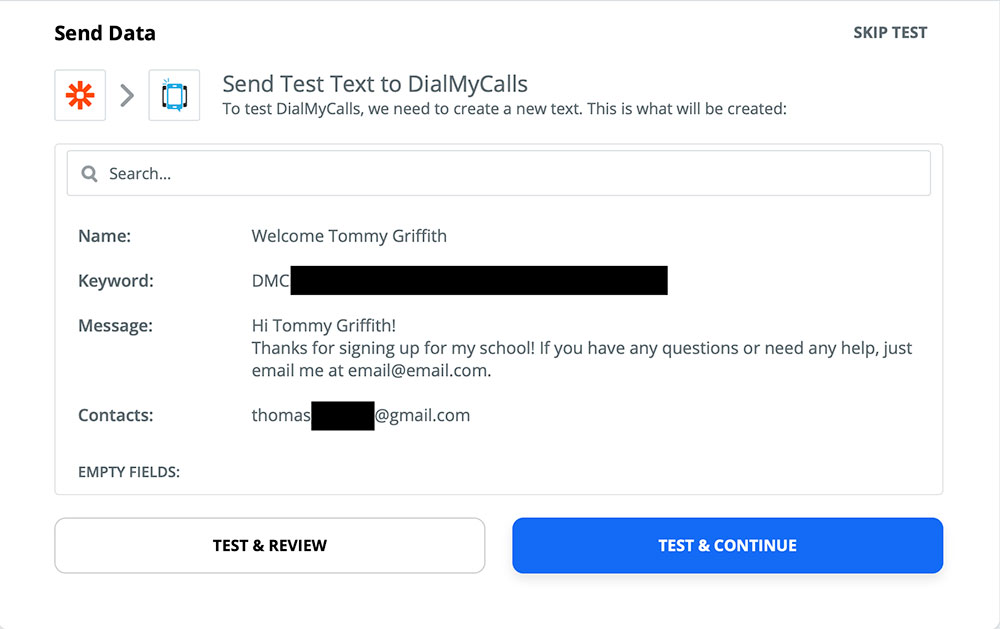
The only thing you’ll need to keep in mind is that when you test this Zap, Zapier is going to send out an email to the email address shown on this page. So be aware that if the email listed here is one of your real students, they’re going to receive the message you just created once you test this Zap. If you don’t want to send this test message, just press SKIP TEST.
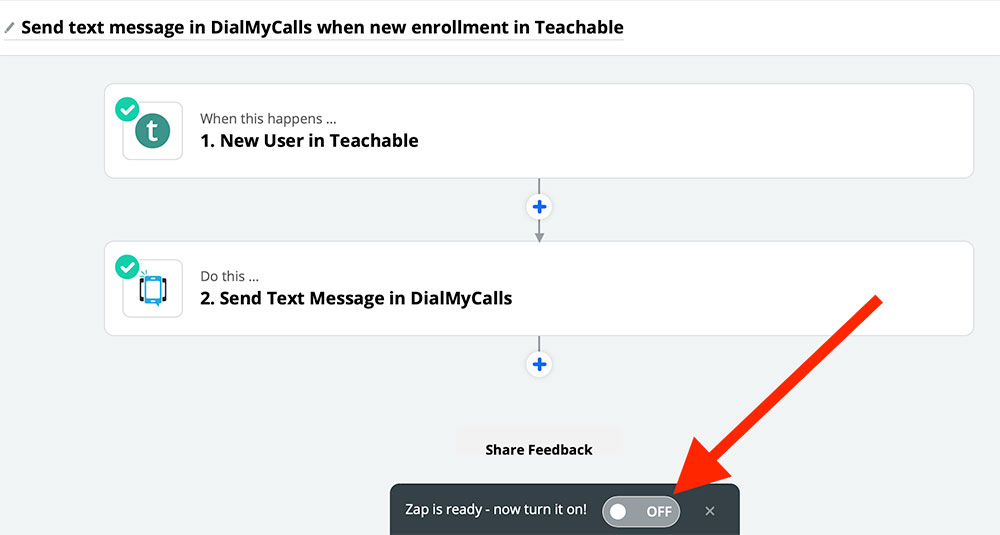
On the next page is the last step, turning on your Zap! Just click that switch at the bottom of your screen and this Zap will be up and running:
DialMyCalls + Teachable Integration Conclusion
Here’s a quick recap of everything we did:
- Created a new Zap
- Chose Teachable as our Trigger app and DialMyCalls as our Action app
- Connected our Teachable account to Zapier
- Completed our DialMyCalls Action template
- Tested our Zap and turned it on
With this DialMyCalls + Teachable Zap turned on, all of your new Teachable students will automatically receive a personalized message welcoming them to your courses. This will give your Teachable service a more personal feel and allow you to give special offers to new students.
You can even create separate Zaps for each of your courses using the same steps we outlined in this example. Using course-specific Zaps will allow you to tailor your automatic emails to each of your students. Don’t hesitate to create more automations so that you get the most out of Teachable, DialMyCalls, and Zapier!